Drupal Code Assistant: Build Chatbot Using Ollama
Introduction:
In our previous article, we explored how to create custom models using Ollama. If you haven’t read it yet, I encourage you to start there. Now, let’s expand on that knowledge by crafting a frontend chatbot application for our Drupal Code Assistant. Let’s dive right into coding it.
Requirements:
We’ll be using Langchain and Streamlit for this tutorial.
Langchain: Langchain is a framework designed to simplify the creation of applications using large language models. Learn more about Langchain.
Streamlit: An open-source Python library that enables quick creation of web applications for data science and machine learning. Learn more about Streamlit
Setting up the Environment:
First, we need to install the necessary packages:
pip install streamlit
pip install langchain_community
Building the Chatbot:
Create a file chatbot.py and insert the following code. We’ll walk through each part step by step.
import streamlit
from langchain_community.llms import ollama
import time

# App title
streamlit.set_page_config(page_title="Drupal Code Assistant")
with streamlit.sidebar:streamlit.title("Drupal Code Assistant")

llm = ollama.Ollama(model="drupal-code-assistant")

# Store llm generated messages.
if "messages" not in streamlit.session_state.keys():
  streamlit.session_state.messages = [{"role": "assistant", "content": "How can i help you?"}]

# Display the messages stored in streamlit messages session.
for message in streamlit.session_state.messages:
  with streamlit.chat_message(message["role"]):
    streamlit.write(message["content"])

# Reset the messages session to null.
def clear_chat_history():
  streamlit.session_state.messages = [{"role": "assistant", "content": "How can i help you?"}]

# Add clear button.
streamlit.sidebar.button("Clear chat history", on_click=clear_chat_history)

def generate_llm_response(prompt):
  response = llm.invoke(input=prompt)

  return response

# Check if the user has entered any input and if yes, assign it to prompt.
if prompt := streamlit.chat_input():
    streamlit.session_state.messages.append({"role": "user", "content": prompt})
    with streamlit.chat_message("user"):
        streamlit.write(prompt)

if streamlit.session_state.messages[-1]["role"] != "assistant":
   with streamlit.chat_message("assistant"):
      response = generate_llm_response(prompt)
      # to show generating of response, char by char.
      placeholder = streamlit.empty()
      bot_response = ""
      for char in response:
        bot_response += char
        placeholder.markdown(bot_response)
        time.sleep(0.02) # to give writing feeling. Adjust as needed.
      message = {"role": "user", "content": bot_response}
      streamlit.session_state.messages.append(message)
To see the application in your browser, run:
streamlit run chatbot.py
If you encounter the “command not found: streamlit” error, use:
python3 -m streamlit run chatbot.py
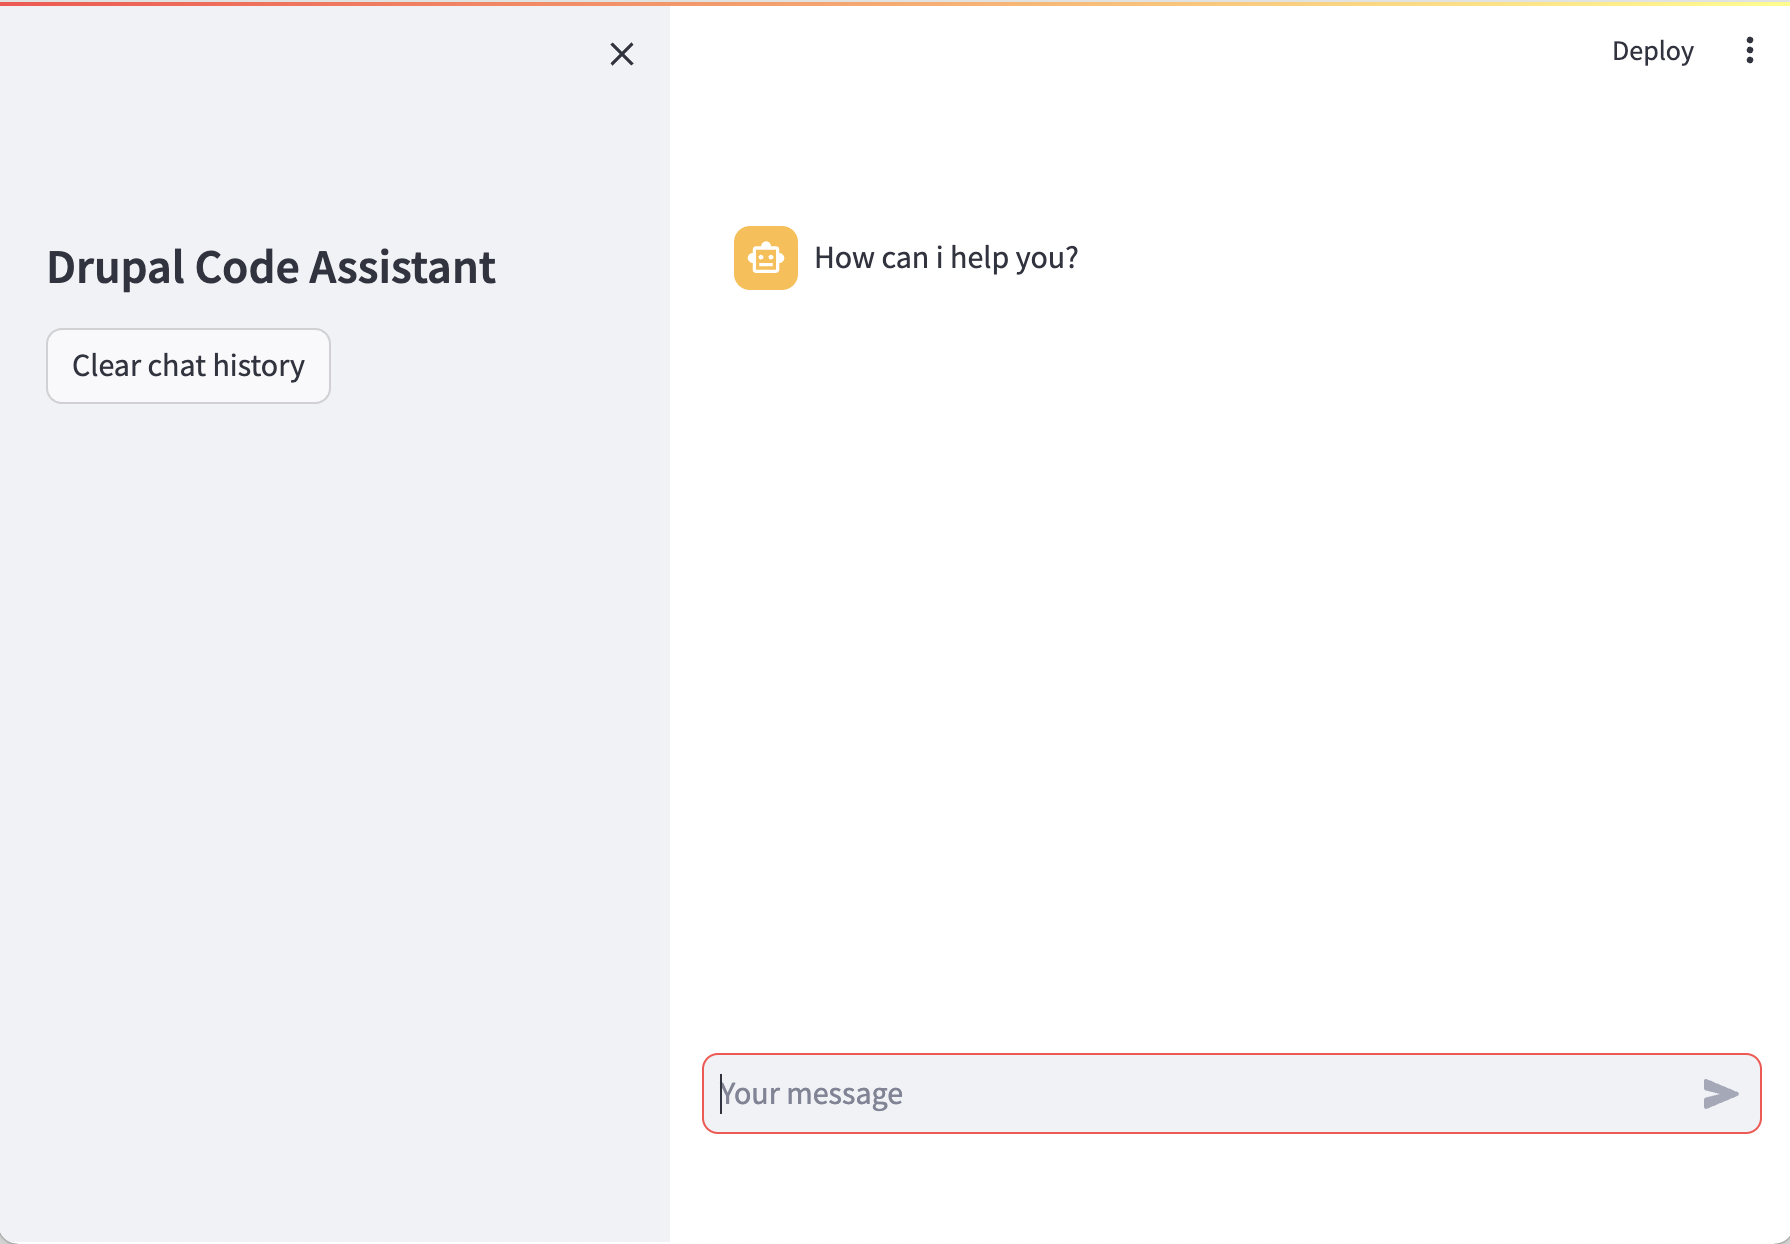
Congratulations! Your chatbot is now ready for interaction.
Let’s decode it word by word:
First, import the libraries.
import streamlit
from langchain_community.llms import ollama
import time
This will set the page title and the side bar title of the chatbot.
streamlit.set_page_config(page_title="Drupal Code Assistant")
with streamlit.sidebar:streamlit.title("Drupal Code Assistant")
Create the ollama object and pass the name of our model drupal-code-assistant
llm = ollama.Ollama(model="drupal-code-assistant")
Now, we check if the messages key exists in the session state. If not, we initialise it with a greeting message from the assistant. In Streamlit, st.session_state is used to preserve state across reruns.
if "messages" not in streamlit.session_state.keys():
    streamlit.session_state.messages = [{"role": "assistant", "content": "How can i help you?"}]
Here, we render all the messages stored in streamlit.session_state.messages using a for loop. Each message contains two elements: ‘role’ and ‘content.’ The application features two roles: ‘user,’ representing the individual interacting with the chatbot, and ‘assistant,’ representing the chatbot itself.
for message in streamlit.session_state.messages:
    with streamlit.chat_message(message["role"]):
        streamlit.write(message["content"])
This will add a button labeled ‘Clear chat history,’ and clicking on it will clear the chat and display the default message, ‘How can I help you?’
# Reset the messages session to null.
def clear_chat_history():
streamlit.session_state.messages = [{"role": "assistant", "content": "How can i help you?"}]

# Add clear button.
streamlit.sidebar.button("Clear chat history", on_click=clear_chat_history)
This function will be used later in the code to generate a response from the LLM model.
def generate_llm_response(prompt):
    response = llm.invoke(input=prompt)
    return response
We use the walrus operator (:=) to check if there is any input in the chat (that is not None or an empty string). If input is present, it’s assigned to the ‘prompt’ variable, and the program proceeds with the ‘if’ condition. When the user submits some text, making ‘prompt’ true, a new message is added to ‘st.session_state.messages’ with the role of ‘user’ and the content of the ‘prompt’.
if prompt := streamlit.chat_input():
    streamlit.session_state.messages.append({"role": "user", "content": prompt})
    with streamlit.chat_message("user"):
        streamlit.write(prompt)
If you recall, we’ve already initialised ‘streamlit.session_state.messages’. Now, we check if the role of the last message is ‘user’ (and not ‘assistant’). If that’s the case, we continue by displaying a placeholder for the assistant’s response with ‘streamlit.chat_message(“assistant”).’ We then fetch the response from ‘generate_llm_response()’ and simulate the chatbot typing out the message by gradually filling the placeholder, character by character, with a time delay of 0.02 seconds between each. Feel free to adjust the speed to your preference.
if streamlit.session_state.messages[-1]["role"] != "assistant":
    with streamlit.chat_message("assistant"):
        response = generate_llm_response(prompt)
        placeholder = streamlit.empty()
        bot_response = ""
        for char in response:
            bot_response += char
            placeholder.markdown(bot_response)
            time.sleep(0.02) # to give writing feeling. Adjust as needed.
        message = {"role": "user", "content": bot_response}
        streamlit.session_state.messages.append(message)
And that’s it! We’ve successfully created a chatbot that runs locally on our own computer.
Final Thoughts: Wrapping up this three-part series, we’ve learned what Ollama is, how to create local LLMs, and how to design chatbot applications like ChatGPT with it—all locally and free!
Video Explaination
If you want video version of this content, check out this video.
Posts in this series
- Drupal Code Assistant: Build Chatbot Using Ollama
- AI Helper: Build Your Own Custom LLM Model on Ollama
- Introducing Ollama: The Local Powerhouse for Language Models